Particle Software
Particle Apps (online IDE) | Console | docs | Community | Support
Quick Page Links
Particle SW Layers | Device ID | IoT Data Integration | Particle IoT Rules Engine | USB Serial & Using UART1 | Libraries | Particle Device OS | Application Firmware | Setup New Device
Particle Software Layers
A Particle device has several layers of software, beginning with the bootloader, SoftDevice, Device OS, tinker, and application firmware.
particle update
particle flash --usb xenon-softdevice@1.3.1-rc.1.bin
particle flash --usb xenon-system@1.3.1-rc.1.bin
particle flash --usb xenon-tinker@1.3.1-rc.1.bin
Device OS (system firmware) is the low-level firmware that supports a Particle device's basic functions. The application firmware is the C++ code that you write.
Update Device OS
Put the device in DFU Mode and then run the CLI command particle update.
Related Links
Reset / fix so that local compile works
Particle Workbench Local Application Firmware Compile
Device ID
Code for Particle devices are organized by the Particle device id and folders. You need to configure code for a particular device by device id and by the USB serial port it connects to. You can change these settings, but in the end it is usually easier to develop code for a particular device. Note also that Workbench automatically works out of the 'Particle' folder off of the Windows OS 'Documents' folder. A folder structure may look like:
..\Documents\Particle\community\libraries\
..\Documents\Particle\argon_e00fce6851335ab78144be42\
..\Documents\Particle\argon_e00fce6851335ab78144be42\blink\
..\Documents\Particle\xenon_e00fce68890fc719bfe6c566\
..\Documents\Particle\xenon_e00fce68890fc719bfe6c566\LoRa\
IoT Data Integration
Linking the Particle Cloud to non-Particle online services is termed integrations. Pushing your data on the Particle Cloud to these integrations allows you to analyze and view your data in a dashboard, send yourself a SMS text message when a particular event occurs, store your data in a different location, and lots of other useful things.
Particle provides integrations to several popular services such as Google Maps, Azure IoT Hub, and the Google Cloud Platform. You may also create your own integration using Particle Webhooks.
You may also push data from your device directly to outside services using CoAP, MQTT, and Server-Sent-Events (SSE) stream, but you are responsible for the connections and the security of the data. Particle prefers that you use Particle publish over a CoAP cloud connection.
Integrations
Integrations with several popular external internet-based services are well documented and easily implemented. Instructions by Particle can be found by following the links below. .
- Azure IoT Hub .
- Google Cloud (see also My Google Integration Notes)
- InfluxData
- IFTTT (If This Then That)
Webhooks
Particle uses a CoAP cloud connection to push data from a Particle device to the Particle Cloud via the Particle.publish() command. When a published event via Particle.publish() is received at the Particle Cloud and a webhook is connected to that event, an outgoing connection is made to the web server designated by the webhook. The outgoing connection should be encrypted TLS/SSL (https), but standard REST API calls (GET, POST, PUT, ..) are permitted.
Particle webhook reference page
The Particle webhook supports mustache templates that perform simple processing of the JSON data going out and/or coming back in the form of variable substitutions. This makes it much easier to format a JSON string for the particular service the data is being pushed to. Below are the pre-defined variables available to put into the JSON string for any webhook:
{{{PARTICLE_DEVICE_ID}}}: The ID of the device that triggered the webhook
{{{PARTICLE_EVENT_NAME}}}: The name of the event that triggers the webhook
{{{PARTICLE_EVENT_VALUE}}}: The data associated with the event
{{{PARTICLE_PUBLISHED_AT}}}: When the event was published
{{{PRODUCT_USER_ID}}}: The user id of the device owner
{{{PRODUCT_VERSION}}}: The firmware version that published the event
Note that the PARTICLE_PUBLISHED_AT variable provides a date/time stamp formatted per ISO 8601. Example: "2020-04-23T10:13:18.600Z"
When developing a Custom Webhook, it can be helpful to be able to simulate the pushing (POST) of data from the Particle Cloud to the target recipient to insure you have the proper formatting, credentials, etc. Using a free REST client tool such as Insommia or Postman are very useful for development and testing.
Typically you want to publish a floating point value to the Particle Cloud.
Think carefuly about the required publishing rates from your device to the Particle
Cloud and any integrations. You can stay within the
free threshold of many services
by keeping your publish rate to every 15 seconds or longer.
Below is a code template to measure the analog inputs on A0 and A1 as quickly
as possible, and then publishing the values for
#include "Particle.h"
#if (PLATFORM_ID == PLATFORM_XENON)
SYSTEM_MODE(MANUAL);
SYSTEM_THREAD(ENABLED);
#endif

// Install library: JsonParserGeneratorRK
// Reference: https://github.com/rickkas7/JsonParserGeneratorRK
#include "JsonParserGeneratorRK.h"

// Timer for publishing analog input values to the Particle Cloud
const unsigned long TIMER_PUBLISH_INTERVAL_MS = 30000; // Min is 1000 ms
unsigned long timerPublishLast = 0;

unsigned long pubCount = 0;
unsigned long publish_error_count = 0;

// Bundle all of the analog input data into a structure.
const byte AI_COUNT = 6;
struct analog_inputs_t {
  byte pin;
  String pinName;
  unsigned int ADC;
  unsigned int ADC_offset;
  unsigned long ai_samples;
  double fs_val;
  String fs_unit;
  double mV_to_fs;
} arr_ai[AI_COUNT];

void setup() {
  Mesh.off(); // Turn the Mesh Radio off

  pinMode(D7, OUTPUT);

  Serial.begin();
  waitFor(Serial.isConnected, 30000);
  Serial.printlnf("System version: %s", (const char*)System.version());

  // Initialize arr_ai
  arr_ai[0].pin = A0;
  arr_ai[0].pinName = "A0";
  arr_ai[1].pin = A1;
  arr_ai[1].pinName = "A1";
  arr_ai[2].pin = A2;
  arr_ai[2].pinName = "A2";
  arr_ai[3].pin = A3;
  arr_ai[3].pinName = "A3";
  arr_ai[4].pin = A4;
  arr_ai[4].pinName = "A4";
  arr_ai[5].pin = A5;
  arr_ai[5].pinName = "A5";
  for (int i=0; i<AI_COUNT; i++) {
    pinMode(arr_ai[i].pin, INPUT);
    arr_ai[i].ADC = 0;
    arr_ai[i].fs_val = 0.0;
    // Move anything below to before for () in order to assign unique values to each analog input.
    arr_ai[i].ADC_offset = 1;               // Calibration correction
    arr_ai[i].mV_to_fs = 0.001;             // Conversion factor to apply to mV analog input reading to full scale
    arr_ai[i].fs_unit = "V";                // Unit for the analog input values in full scale
  }

} // setup()


void loop() {

  ReadAnalogInputs();
  PublishAiVals();

} // loop()


void ReadAnalogInputs() {
  // 12 bit ADC (values between 0 and 4095 or 2^12) or a resolution of 0.8 mV
  // Hardware minimum sample time to read one analog value is 10 microseconds.
  // Raw ADC values are adjusted by a calibration factor arr_ai_ADC_calib[n].ADCoffset
  // that is determined by bench testing against precision voltage reference.
  // Update .ADC with the cumulative ADC value (to calculate average over the publish interval).
  // Update .fs_val with the current ADC value and check for alarm conditions.
  for (int i=0; i<AI_COUNT; i++) {
    int ADC = analogRead(arr_ai[i].pin) + arr_ai[i].ADC_offset;
    arr_ai[i].ADC += ADC;
    arr_ai[i].fs_val = double(ADC) * 3300.0 / 4096.0 * arr_ai[i].mV_to_fs;
    arr_ai[i].ai_samples++;
  } // for
}  // ReadAnalogInputs()


void PublishAiVals() {
  if (timerPublishLast > millis())  timerPublishLast = millis();
  if ((millis() - timerPublishLast) > TIMER_PUBLISH_INTERVAL_MS) {

    if (pubCount %2)
      digitalWrite(D7, HIGH);
    else
      digitalWrite(D7, LOW);

    // This creates a buffer to hold up to 256 bytes of JSON data (good for Particle.publish)
    JsonWriterStatic<256> jw;
    jw.setFloatPlaces(3);

    for (int i=0; i<AI_COUNT; i++) {
      double fs_val = double(arr_ai[i].ADC) / double(arr_ai[i].ai_samples) * 3300.0 / 4096.0 * arr_ai[i].mV_to_fs;
      //jw.insertKeyValue(arr_ai[i].pinName, fs_val);
      jw.insertKeyValue("field" + String(i+1), fs_val);
      arr_ai[i].ADC = 0;
      arr_ai[i].ai_samples = 0;
    } // for

    Serial.printlnf("jw.getBuffer() = '%s'", jw.getBuffer());
    // jw.getBuffer() = '"field1":0.054,"field2":1.609,"field3":2.000,"field4":0.001,"field5":0.001,"field6":0.001'

    byte PubResult = Particle.publish("thingspeak_ai", jw.getBuffer(), PRIVATE);
    if (PubResult == 1)
      publish_error_count = 0;
    else
      publish_error_count++;


    pubCount++;
    timerPublishLast = millis();
  } // timer
} // PublishAiVals()
ThingsBoard
This is software (only) that needs to be installed on a cloud based system such as Azure, Google, AWS. The website does however have a cloud service setup that allows you to try out the product. The ThingsBoard IoT Platform supports HTTP, MQTT, and CoAP APIs. It has a rich set of features including a Dashboard, Rule Engine (node flow based), and Trendz Analytics. You can sign up for a free Community Edition subscription to test it out on an unlimited number of devices. A Live Demo Server is available for initial sandbox testing. Details on how to create a Particle Webhook to ThingsBoard is available on this page. The software is free for both personal and commercial use. The Professional Editon subscription supports customer management.
Ubidots
Custom Particle Webhook to Ubidots
Adafruit IO
Adafruit IO is a free cloud based IoT sevice for the display of IoT data to a custom dashboard. Multiple feeds are supported, they may be public or private, and you can configure triggers to react to specific limits relative to your data values. The notifications feature will alert you when no new data has been received for your feed after the specified amount of time. Integrations to IFTT and Zapier are included. The free account is limited to 10 feeds (channels) and 60 messages per minute. Details on how to create a Particle Webhook to Adafruit IO is available on this page.
ThingSpeak
The ThingSpeak IoT Platform allows you to aggregate, visualize, and analyze live data streams in the cloud. Data can be sent to ThingSpeak using both REST and MQTT APIs. Data analysis and visualization is performed using MATLAB apps. A ThingSpeak Alerts API allows you to send email alerts. Details on how to create a Particle Webhook to ThingSpeak is available on this page.
Telegraf (InfluxData)
The Telegraf server agent from influxdata provides a connection between the Particle Cloud and other services such as cloud based databases, etc. InfluxData Services include Telegraf data collection service, InfluxDB for cloud data storage, Chronograf for data analysis, and Kapacitor for alerting. For high availability, it is necessary to choose the Enterprise subscription for InfluxDB (blog with more details). The free influxdata plan allows 5 MB / 5 min and up to 5 tasks.
InfluxData integration tutorial by Particle
Integrating Particle with InFluxDB Cloud
Server-Sent-Events (SSE) Stream
Another option is the use of Server-Sent-Events (SSE) stream. The Particle Cloud can push events to a server connection in real time, but this type of connection cannot distribute SSE traffic across multiple servers.
CoAP - Constrained Application Protocol
Particle runs CoAP over TCP (not UDP) using DTLS or AES for features like publish, subscribe, OTA, etc. This avoids the problem of firewalls that often block packets going out over UDP. Each CoAP message must be stand-alone and fit within a single packet. CoAP is ideal for very low bandwidth stateless connections like LoRa, ZigBee, and Bluetooth.
CoAP by DZone
MQTT
Particle libraries:
MQTT-TLS for Photon, Spark Core
Particle and Ubidots using MQTT
Particle IoT Rules Engine
The IoT RULES ENGINE lets you create cloud-side IoT applications based on business rules in hours, not months These applications include real-time alerting, visualizations & analytics, fleet-wide remote diagnostics, data management, over-the-air (OTA) firmware updates. Requires Particle Beta approval to access.
Select Two-Legged Auth (Server) and provide a unique Name.
- Twilo
- Slack via Incoming Webhook
IoT Rules Engine in the GitHub particle-iot/docs
USB Serial
The best was to generate serial logging through the USB serial connection back to the connected PC is to use the Particle logging library. The log handler is better than directly writing to the serial port because it includes thread safety and timestamps. You may also easily switch between Serial1 (TX/RX) and Serial (USB). The logging library is well documented and provides many powerful options.
Create a sketch with the code below, and then within Workbench (Visual Studio Code), launch the CLI and enter the command particle serial monitor. You may be asked by Workbench to identify your device and/or serial port. Thereafter you should see the serial log output in the CLI terminal window. Use the keys 'CTRL-C' to stop the serial monitor. If you reset your device while monitoring the serial output, you will need to stop and restart the serial monitor.
SerialLogHandler logHandlerUSB(LOG_LEVEL_ALL);
void setup() {
}
void loop() {
  Log("%lu ms", millis());  // CLI cmd: "particle serial monitor"
  delay(1000);
}
The default Log logger uses the app category and the default logging level LOG_LEVEL_INFO. I am not able to capture log output in setup() level.
You may also Serial to output messages from a Particle device to the USB serial connection to a PC.
void setup() {
  Serial.begin();
  waitFor(Serial.isConnected, 30000);
  delay(1000);
  Serial.printlnf("System version: %s", (const char*)System.version());
}

void loop() {
  Serial.printlnf("%lu ms", millis());  // CLI cmd: "particle serial monitor"
  delay(1000);
}
See the Particle serial docs for more serial options.
Use of Tx/D9 & Rx/D10 UART1 for Serial Communications
Attempting to communicate at very high baud rates over UART1 may lead to lost data. Anything in loop() is in sequence with the Particle Device OS (unless changed by compiler directives).
Library by rickas7 for use of external UART NXP SC161S740
Particle OS Firmware
System Thread
By default the Particle shares a thread between the Particle Device OS firmware and the application firmware. If additional application firmware speed / responsiveness is required, or you need your application code to run before the cloud connection is established, then you can configure the application firmware to run in parallel to the Device OS firmware by using the configuration option SYSTEM_THREAD(ENABLED); at the top of the application code.
SYSTEM_THREAD(ENABLED);
void setup() {
}
void loop() {
}
System Modes
The connection of your device to the Particle Cloud is managed by the configuration option system modes. The default AUTOMATIC mode establishes a connection to the Particle Device Cloud before the applicaton firmware is executed (unless you have implemented SYSTEM_THREAD(ENABLED)) . It also causes Device OS communication to be managed in series with each loop() of the application firmware. SEMI_AUTOMATIC disables automatic Particle Device Cloud connection, requiring you to manage the connection in your application firmware with the command Particle.connect(). In the MANUAL mode you must establish a connection with the Particle.connect() and implement the Particle.process() command to manage incoming messages and to keep the cloud connection alive.
SYSTEM_MODE(AUTOMATIC);

void setup() {
}

void loop() {
}
System Modes in docs
More on System Modes & System Thread
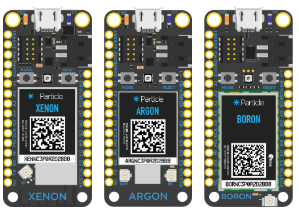
Identify the platform (Argon/Boron/Xenon) of your device in the application code:
#if (PLATFORM_ID == PLATFORM_ARGON)
    // Argon
#elif (PLATFORM_ID == PLATFORM_BORON)
    // Boron
#elif (PLATFORM_ID == PLATFORM_XENON)
    // Xenon
#endif

void setup() {
  if (PLATFORM_ID == PLATFORM_ARGON) {
    Serial.print("SSID: "); Serial.println(WiFi.SSID());
  }
}

void loop() {
}
Application Firmware
/*
 * Project      blink
*/

#include "Particle.h"

PRODUCT_ID(0); // values 0 to 65535.  This ID will be used by the Particle Device Cloud to identify which devices belong to YOUR Product.
PRODUCT_VERSION(1); // values 0 to 65535.  Increment each time you release an official version to your Product.
Product Tools in Particle docs
Your Product ID in Particle docs
Preparing a binary in Particle docs
Setup New Device
Setup Argon or Boron via USB
Install / update Particle CLI by using the CLI command:
particle update-cli
Update the Particle Device OS on the device by putting the device into DFU mode and executing the CLI command:
particle update
Update the Tinker software on the device by putting the device into DFU mode and executing the CLI command:
particle flash --usb tinker
Put the device into listening mode and issue the CLI command:
particle serial inspect
Continue if all results are 'PASS', otherwise open up a support ticket.
Put the device into listening mode and issue the CLI command:
particle serial identify
Continue based on device platform (Boron or Argon)
Boron
Get the 'device id', 'ICCID' reported (you will need it later).
If using Particle SIM card built into the Boron, go to https://setup.particle.io/, click on the link 'Activate a Particle SIM' under the pictures. To activate a 3rd party SIM, follow these instructions. Once the SIM is activated, exit listening mode by issuign the CLI command:
particle usb stop-listening
Give the device a couple of minutes to complete cellular registration. Reboot the device, and repeat the particle usb stop-listening command until it begins breathing cyan.
Argon
Get the 'device id' reported (you will need it later).
Set the WiFi credentials on the Argon by putting it into listening mode and issuing the CLI command:
particle serial wifi
If successful, after blinking green, blinking cyan, and then fast blinking cyan, the Argon should be breathing cyan (indicates it is connected to the Particle Cloud).
Boron/Argon
While the device is breathing cyan, claim the device to your Particle account by entering the CLI command below and replacing {device id} with what was reported eariler:
particle device add {device id}
You may optionally rename the device by choosing a unique device name {new name} to your account and issuing the CLI command:
particle device rename {device id} {new name}
Change the device setup flag to 'done' by issuing the CLI command:
particle usb setup-done
Power Saving / Sleep Mode
See Low Power Operation / Charging
Security
Libraries
The cloud version (specified in project properties) takes precedence over any local installed library (version). To use a local version and ignore the cloud version, remove the library dependency reference in the properties file (use the hash '#' to comment it out. Once a library exists in the 'libs' folder, it will be used unless the same is referenced in the properties file.
The command below will copy a library from the cloud to your local project folder.
particle library copy libraryName
Creating a Library
Create an empty folder named after your library name (my-lib). In Particle Workbench CLI, change to that folder (my-lib) and generate a library file structure using the CLI command particle library create. You will be prompted for the name of the library, the version, and the author. Edit the my-lib files to create the library. Create a new project proj-using-my-lib that will use the library (in a normal project folder location), and test it's features. Manually add a subfolder lib to the project proj-using-my-lib and copy the complete library (my-lib) into that lib folder.
\particle\argon\proj-using-my-lib\
\particle\argon\proj-using-my-lib\lib\my-lib\

\particle\libraries\my-lib\
\particle\libraries\my-lib\examples\
\particle\libraries\my-lib\src\
\particle\libraries\my-lib\src\my-lib.cpp
\particle\libraries\my-lib\src\my-lib.h
Before uploading a private library, make sure the library folder is clean of PDF and other files that you don't want uploaded (you cannot remove them later). Upload a private version of the library you created by first changing to the folder where the library resides, and then using the CLI command particle library upload. You may upload the private version multiple times until you are satisfied with the final result. To make the private library public, use the CLI command particle library publish my-lib. Make sure that '{my-lib}' corresponds to name={my-lib} in the file library.properties. The only way to remove a private library is to submit a support ticket to Particle.
Use the command particle library publish {my-lib} in the CLI to make the latest private version available to the public. Incremented versioning of the public library is required.
Using a Library
A library that has been uploaded to Particle's Library can be found by searching using the CLI command particle library search {library name}. Once the exact library name is found, it may be installed using the command particle library install {library name}. ??? or is it particle library add {library name} ???
Notes & Links
'application.h' is depreciated and replaced by 'Particle.h'.
Support
Particle Support
Direct Particle Links
Apps (online IDE) | Console | docs | Community | Support
Do you need help developing or customizing a IoT product for your needs? Send me an email requesting a free one hour phone / web share consultation.
The information presented on this website is for the author's use only. Use of this information by anyone other than the author is offered as guidelines and non-professional advice only. No liability is assumed by the author or this web site.
.png)
.jpg)

 (4).png)


.png)




.jpg)
.png)
.png)