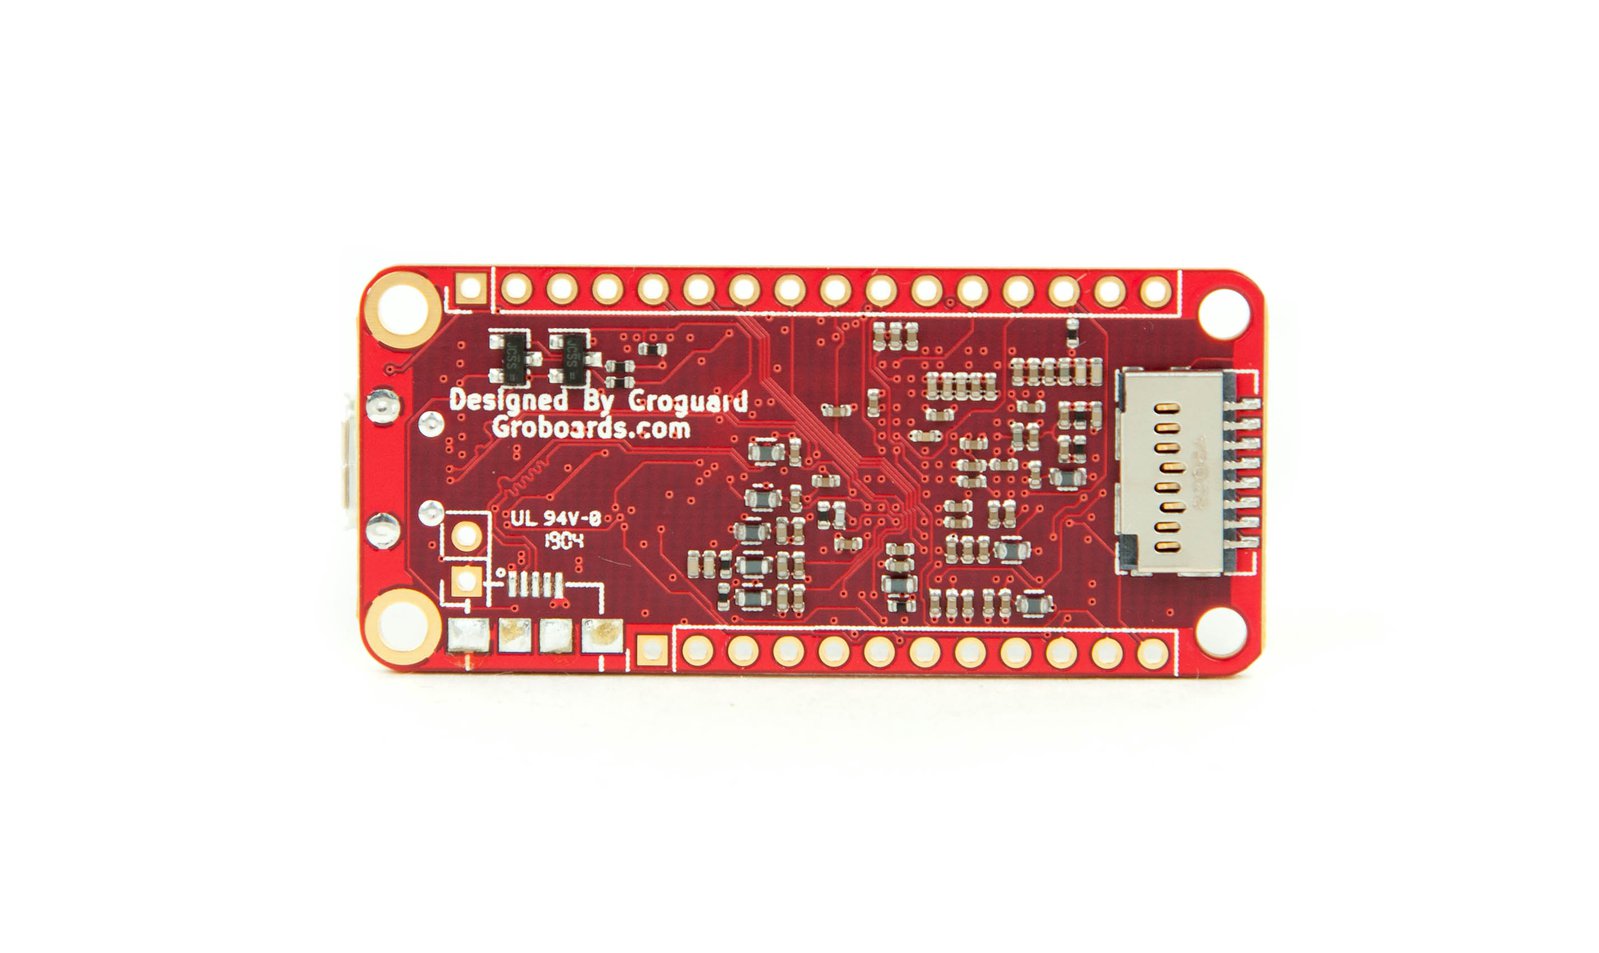
Feather HUZZAH ESP8266
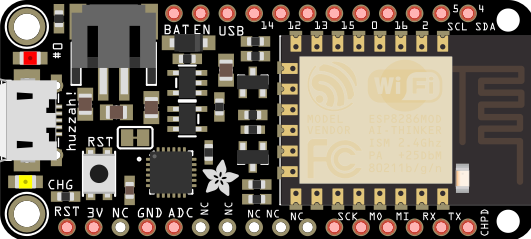
ESP8266 WiFi microcontroller with the Tensilica chip core, 80 MHz, 3.3V logic, fast USB serial communications, 9 x GPIO pins (12 mA/pin max), 1 x analog inputs 1.0V max, 100mA LiPoly charger, 4MB FLASH (no EEPROM), and WiFi 802.11 b/g/n.
Adafruit Feather HUZZAH ESP8266 product
Adafruit Feather HUZZAH ESP8266 tutorial
Recommended I2C pins: SDA = GPIO #4; SCL = GPIO #5
Recommend SPI: SCK = GPIO #14; MOSI = GPIO #13; MISO = GPIO #12
Assume 250 mA available for other connected (stacked) FeatherWings.
A built-in red LED is connected to GPIO #0, and blue LED on GPIO #2 (both reverse wired, so LOW = ON).
1x analog inputs 1.0V max on GPIO #17 (A0)
If not using SPI, then okay to use GPIO #12, #13, #14 for DIO @ 3.3V logic level and max 12 mA current draw per pin (6 mA recommended).
Control pin EN (CH_PD) or "Chip Power Down" is pulled high by default. When pulled low, the chip
D15 is only free DIO (unless using Serial.swap(), see note). Next choice is I2C or SPI pins if not in use. 6 mA recommended.
Pinout Diagram
The pinout diagram below is organized to lay over the physical footprint of the devices when they are oriented with the USB connector at the top, and looking from the top of the devices (header pins pointing downward).
| Feather HUZZAH ESP8266 |
| | Feather HUZZAH ESP8266 |
|---|---|---|
| RST | | | --- |
| 3V3 | | | --- |
| --- | | | --- |
| GND | | | --- |
| D17 (A0 1.0V) | | | Vbat |
| --- | | | EN |
| --- | | | Vbus |
| --- | | | SCK D14 |
| --- | | | MISO D12 |
| --- | | | MOSID13 |
| SCK D14 | | | D15 |
| MOSI D13 | | | D0 built-in Red LED |
| MISO D12 | | | WAKE D16 |
| Rx D3 | | | D2 built-in Blue LED |
| Tx D1 | | | SCL D5 |
| -ChipPowerDown- | | | SDA D4 |
Color Key: SPI Serial I2C
Software Serial
For non-USB UART, if not using I2C, then use GPIO #4 & #5. If not using SPI, then you may use GPIO #14, #13, or #12 (choose any two). If using I2c and SPI, then you are out of options. If you try to use the remaining pins, you will have trouble with the microcontroller restarting, and uploading new code.
#include <SoftwareSerial.h>
// SoftwareSerial(rxPin, txPin, inverse_logic)
SoftwareSerial softSerial(14,12);

setup() {
  Serial.begin(9600);	// hardware serial for USB port
  softSerial.begin(9600);
}

loop() {
  if (softSerial.available()) {
    Serial.print(softSerial.read());
  }
}
Note: The command "Serial.swap()" moves the ESP8266 serial port from Rx on GPIO 3 and Tx on GPIO 1 to Rx on GPIO 15 and Tx on GPIO 13
WiFi Modes of ESP8266
Station Mode (STA) allows the ESP8266 to connect to a WiFi access point.
Soft Access Point (AP) - the ESP8266 access as a WiFi access point that your phone/PC may connect to. Frequently a access point provides intenet access, but this is not the case for a Soft Access Point. Instead, you can interact with the ESP8266 directly from your phone/PC over WiFi.
Soft AP + Station - the ESP8266 is configured to behave in both Station Mode and Soft AP Mode.
Get WiFi Credentials From User Via Access Point
This link to the project below shows you how to program your ESP8266 based Feather or FeatherWing to present a local WiFi access point to the user, from which they can connect to with a smartphone / PC, and then submit new WiFi credentials for a new WiFi connection through an internet browser.
Get new ESP8266 WiFi credentials via local Access Point
Connect to WiFi
Client HTTP GET with Basic Authentication
/*
  AF_Feather_HUZZAH_ESP8266_HTTP_GET_Basic_Auth.ino

  Adafruit Feather HUZZA ESP8266
  HTTP GET with basic authentication

  This sketch will send a HTTP GET with basic authentication to POSTMAN Echo.
    Postman Echo is service you can use to test your REST clients and make sample API calls.
    It provides endpoints for GET, POST, PUT, various auth mechanisms and other utility endpoints.
    Google search for "POSTMAN Echo" for more information.

  Arduino IDE:
    Set the board to "Generic ESP8266 Module" or "Adafruit Feather HUZZAH ESP8266"
    Set port ('Tools','Port').  Use Windows 'Devices and Printers' to find the device port.
    Do not have serial monitor loaded while uploading.
*/

// In Arduino IDE choose:
//  Board: Adafruit Feather HUZZAH ESP8266
//  CPU Frequency: 80 MHz
//  Flash size: 4 M (3M SPIFFS)
//

/////////////////////////////////////////////////////////////////////////
const byte pinBuiltInRedLED = 0;  // reverse wired, LOW turns LED on
const byte pinBuiltInBlueLED = 2; // reverse wired, LOW turns LED on

void blinkLED(byte ledPIN){
  //  consumes 300 ms.
  for(int i = 5; i>0; i--){
    digitalWrite(ledPIN, LOW);
    delay(30);
    digitalWrite(ledPIN, HIGH);
    delay(30);
  }
} //blinkLED()
/////////////////////////////////////////////////////////////////////////
// Library for ESP8266

// https://github.com/esp8266/Arduino/tree/master/libraries/ESP8266HTTPClient
#include <ESP8266WiFi.h>
#include <ESP8266HTTPClient.h>

// Below is the POSTMAN Echo server IP address.
// To get it, you must use the POSTMAN app or brower interface to send a
// HTTP GET with basic authentication and then in the POSTMAN console,
// look in the response for the 'Network' icon (globe icon), and then
// get the 'Remote Address'.
#define SERVER_IP "34.205.34.223"

#ifndef STASSID
#define STASSID "your-wifi-ssid"
#define STAPSK "your-wifi-password"
#endif

/////////////////////////////////////////////////////////////////////////


void setup() {

  pinMode(pinBuiltInRedLED, OUTPUT);
  digitalWrite(pinBuiltInRedLED, HIGH);

  pinMode(pinBuiltInBlueLED, OUTPUT);
  digitalWrite(pinBuiltInBlueLED, HIGH);

  Serial.begin(115200);
  while (!Serial) {
    delay(10);
    blinkLED(pinBuiltInRedLED);
  }
  Serial.println("\nSerial ready");

  WiFi.begin(STASSID, STAPSK);
  while (WiFi.status() != WL_CONNECTED) {
    delay(500);
    Serial.print(".");
  }
  Serial.println("");
  Serial.print("Connected! IP address: ");
  Serial.println(WiFi.localIP());

  Serial.println("Setup complete"); Serial.println("");
} // setup()


void loop() {
  // wait for WiFi connection
  if ((WiFi.status() == WL_CONNECTED)) {
    digitalWrite(pinBuiltInRedLED, LOW);

    WiFiClient client;
    HTTPClient http;

    Serial.print("[HTTP] begin...\n");
    // configure traged server and url
    //http.begin(client, "http://postman-echo.com/basic-auth");
    http.begin(client, "http://" SERVER_IP "/basic-auth/");  // HTTP

    http.addHeader("Content-Type", "application/json"); // does no harm included / excluded.

    http.setAuthorization("postman", "password");

    Serial.print("[HTTP] GET...\n");
    int httpCode = http.GET();

    // httpCode will be negative on error
    if (httpCode > 0) {
      // HTTP header has been send and Server response header has been handled
      Serial.printf("[HTTP] POST... code: %d\n", httpCode);
      digitalWrite(pinBuiltInRedLED, HIGH);

      // file found at server
      if (httpCode == HTTP_CODE_OK) {
        const String& payload = http.getString();
        Serial.println("received payload:\n<<");
        Serial.println(payload);
        Serial.println(">>");
      }
    } else {
      Serial.printf("[HTTP] POST... failed, error: %s\n", http.errorToString(httpCode).c_str());
    }

    http.end();
  }

  blinkLED(pinBuiltInRedLED);
  delay(10000);

} // loop()
Client HTTP POST with Basic Authentication
/*
  AF_Feather_HUZZAH_ESP8266_HTTP_POST_Basic_Auth.ino

  Adafruit Feather HUZZA ESP8266
  HTTP GET with basic authentication

  This sketch will send a HTTP GET with basic authentication to POSTMAN Echo.
    Postman Echo is service you can use to test your REST clients and make sample API calls.
    It provides endpoints for GET, POST, PUT, various auth mechanisms and other utility endpoints.
    Google search for "POSTMAN Echo" for more information.

  Arduino IDE:
    Set the board to "Generic ESP8266 Module" or "Adafruit Feather HUZZAH ESP8266"
    Set port ('Tools','Port').  Use Windows 'Devices and Printers' to find the device port.
    Do not have serial monitor loaded while uploading.
*/

// In Arduino IDE choose:
//  Board: Adafruit Feather HUZZAH ESP8266
//  CPU Frequency: 80 MHz
//  Flash size: 4 M (3M SPIFFS)
//

/////////////////////////////////////////////////////////////////////////
const byte pinBuiltInRedLED = 0;  // reverse wired, LOW turns LED on
const byte pinBuiltInBlueLED = 2; // reverse wired, LOW turns LED on

void blinkLED(byte ledPIN){
  //  consumes 300 ms.
  for(int i = 5; i>0; i--){
    digitalWrite(ledPIN, LOW);
    delay(30);
    digitalWrite(ledPIN, HIGH);
    delay(30);
  }
} //blinkLED()
/////////////////////////////////////////////////////////////////////////
// Library for ESP8266

// https://github.com/esp8266/Arduino/tree/master/libraries/ESP8266HTTPClient
#include <ESP8266WiFi.h>
#include <ESP8266HTTPClient.h>

// Below is the POSTMAN Echo server IP address.
// To get it, you must use the POSTMAN app or brower interface to send a
// HTTP GET with basic authentication and then in the POSTMAN console,
// look in the response for the 'Network' icon (globe icon), and then
// get the 'Remote Address'.
#define SERVER_IP "34.205.34.223"

#ifndef STASSID
#define STASSID "your-wifi-ssid"
#define STAPSK "your-wifi-password"
#endif

/////////////////////////////////////////////////////////////////////////


void setup() {

  pinMode(pinBuiltInRedLED, OUTPUT);
  digitalWrite(pinBuiltInRedLED, HIGH);

  pinMode(pinBuiltInBlueLED, OUTPUT);
  digitalWrite(pinBuiltInBlueLED, HIGH);

  Serial.begin(115200);
  while (!Serial) {
    delay(10);
    blinkLED(pinBuiltInRedLED);
  }
  Serial.println("\nSerial ready");

  WiFi.begin(STASSID, STAPSK);
  while (WiFi.status() != WL_CONNECTED) {
    delay(500);
    Serial.print(".");
  }
  Serial.println("");
  Serial.print("Connected! IP address: ");
  Serial.println(WiFi.localIP());

  Serial.println("Setup complete"); Serial.println("");
} // setup()


void loop() {
  // wait for WiFi connection
  if ((WiFi.status() == WL_CONNECTED)) {
    digitalWrite(pinBuiltInRedLED, LOW);

    WiFiClient client;
    HTTPClient http;

    Serial.print("[HTTP] begin...\n");
    // configure traged server and url
    http.begin(client, "http://" SERVER_IP "/post/");  // HTTP
    http.addHeader("Content-Type", "application/json"); // does no harm included / excluded.
    http.setAuthorization("postman", "password");

    Serial.print("[HTTP] POST...\n");
    int httpCode = http.POST("{\"id\":\"20220603T132201\"}");

    // httpCode will be negative on error
    if (httpCode > 0) {
      // HTTP header has been send and Server response header has been handled
      Serial.printf("[HTTP] POST... code: %d\n", httpCode);
      digitalWrite(pinBuiltInRedLED, HIGH);

      // file found at server
      if (httpCode == HTTP_CODE_OK) {
        const String& payload = http.getString();
        Serial.println("received payload:\n<<");
        Serial.println(payload);
        Serial.println(">>");
      }
    } else {
      Serial.printf("[HTTP] POST... failed, error: %s\n", http.errorToString(httpCode).c_str());
    }

    http.end();
  }

  blinkLED(pinBuiltInRedLED);
  delay(10000);

} // loop()
Client HTTP POST with Basic Authentication & Bear SSL
/*
  AF_Feather_HUZZAH_ESP8266_HTTP_POST_Basic_Auth_BearSSL.ino

  Adafruit Feather HUZZA ESP8266
  HTTP POST with basic authentication and BearSSL

  This sketch will send a HTTP GET with basic authentication to POSTMAN Echo.
    Postman Echo is service you can use to test your REST clients and make sample API calls.
    It provides endpoints for GET, POST, PUT, various auth mechanisms and other utility endpoints.
    Google search for "POSTMAN Echo" for more information.

  Arduino IDE:
    Set the board to "Generic ESP8266 Module" or "Adafruit Feather HUZZAH ESP8266"
    Set port ('Tools','Port').  Use Windows 'Devices and Printers' to find the device port.
    Do not have serial monitor loaded while uploading.
*/

// In Arduino IDE choose:
//  Board: Adafruit Feather HUZZAH ESP8266
//  CPU Frequency: 80 MHz
//  Flash size: 4 M (3M SPIFFS)
//
/////////////////////////////////////////////////////////////////////////
// https://arduinojson.org/?utm_source=meta&utm_medium=library.properties
#include <ArduinoJson.h>
static char msg[50];

// A JsonDocument is *not* a permanent storage; it's only a temporary storage
// used during the serialization phase. See:
// https://arduinojson.org/v6/faq/why-must-i-create-a-separate-config-object/

/////////////////////////////////////////////////////////////////////////
// ESP8266 WiFi Library

// https://github.com/esp8266/Arduino/blob/master/libraries/ESP8266HTTPClient/examples/BasicHttpsClient/BasicHttpsClient.ino

#include <Arduino.h>

#include <ESP8266WiFi.h>
#include <ESP8266WiFiMulti.h>

#include <ESP8266HTTPClient.h>

#include <WiFiClientSecureBearSSL.h>

// Fingerprint for the host you are connecting to (POSTMAN)
// https://arduino-esp8266.readthedocs.io/en/2.4.0/esp8266wifi/client-secure-examples.html
// 99 c3 89 d6 54 04 82 a3 fd e2 ff 8e 9d c0 78 73 08 30 f0 68
const uint8_t fingerprint[20] = { 0x99, 0xc3, 0x89, 0xd6, 0x54, 0x04, 0x82, 0xa3, 0xfd, 0xe2, 0xff, 0x8e, 0x9d, 0xc0, 0x78, 0x73, 0x08, 0x30, 0xf0, 0x68 };

// Below is the POSTMAN Echo server IP address.
// To get it, you must use the POSTMAN app or brower interface to send a
// HTTP GET with basic authentication and then in the POSTMAN console,
// look in the response for the 'Network' icon (globe icon), and then
// get the 'Remote Address'.
#define SERVER_IP "34.205.34.223"

// URL for remote server to be connected to with HTTPS POST
//const char *REMOTE_URL = "http://" SERVER_IP "/post/";
const char *REMOTE_URL = "https://postman-echo.com/post/";

ESP8266WiFiMulti WiFiMulti;

/////////////////////////////////////////////////////////////////////////
const byte pinBuiltInRedLED = 0;  // reverse wired, LOW turns LED on
const byte pinBuiltInBlueLED = 2; // reverse wired, LOW turns LED on

void blinkLED(byte ledPIN){
  //  consumes 300 ms.
  for(int i = 5; i>0; i--){
    digitalWrite(ledPIN, LOW);
    delay(30);
    digitalWrite(ledPIN, HIGH);
    delay(30);
  }
} //blinkLED()
/////////////////////////////////////////////////////////////////////////


void setup() {

  pinMode(pinBuiltInRedLED, OUTPUT);
  digitalWrite(pinBuiltInRedLED, HIGH);

  pinMode(pinBuiltInBlueLED, OUTPUT);
  digitalWrite(pinBuiltInBlueLED, HIGH);

  Serial.begin(115200);
  while (!Serial) {
    delay(10);
    blinkLED(pinBuiltInRedLED);
  }
  Serial.println("\nSerial ready");

  // Configure ESP8206 for WiFi connection
  WiFi.mode(WIFI_STA);
  WiFiMulti.addAP("your-wifi-ssid", "your-password");

  Serial.println("Setup complete"); Serial.println("");
} // setup()


void loop() {

  // wait for WiFi connection
  if ((WiFiMulti.run() == WL_CONNECTED)) {
    digitalWrite(pinBuiltInRedLED, LOW);
    std::unique_ptr<BearSSL::WiFiClientSecure> client(new BearSSL::WiFiClientSecure);

    // Below uses the SSL certificate..
    client->setFingerprint(fingerprint);
    // Below ignores the SSL certificate.
    //client->setInsecure();

    HTTPClient https;

    Serial.print("[HTTPS] begin...\n");
    if (https.begin(*client, REMOTE_URL)) {

      // Allocate the JSON document
      // Inside the brackets, 100 is the RAM allocated to this document.
      // Change this value to match your requirement.
      // Use https://arduinojson.org/v6/assistant to compute the capacity.
      StaticJsonDocument<48> doc;
      doc["id"] = "20220603T190601";
      //doc["time"] = millis();
      // Convert the JSON object to a string and write it to msg.
      serializeJson(doc, msg, 50);
      Serial.println(msg);

      // Configure the basic authentication Username and Password.
      https.setAuthorization("postman", "password");

      https.addHeader("Content-Type", "application/json"); // does no harm included / excluded.

      char len[3];
      sprintf(len, "%d", strlen(msg));
      https.addHeader("Content-Length", String(len));

      // start connection and send HTTP header and body
      Serial.print("[HTTPS] POST...\n");
      int httpCode = https.POST(msg);

      // httpCode will be negative on error
      // However, it is only fully accepted if httpCode== 200
      if (httpCode < 0) {
        Serial.printf("[HTTPS] POST... failed, error: %s\n", https.errorToString(httpCode).c_str());
        Serial.printf("Check URL");
      } else if (httpCode == 200) {
        // HTTPS GET was successful...
        Serial.printf("[HTTPS] POST successful.");
        const String& payload = https.getString();
        Serial.println("received payload:\n<<");
        Serial.println(payload);
        Serial.println(">>");
      } else {
        // HTTPS GET problem.
        Serial.printf("[HTTPS] POST error.  Response code: %d\n", httpCode);
        const String& payload = https.getString();
        Serial.println("received error response:\n<<");
        Serial.println(payload);
        Serial.println(">>");
      }

      https.end();
    } else {
      Serial.printf("[HTTPS] Unable to connect\n");
    }
  }

  Serial.println("Wait 20s before next round...");
  blinkLED(pinBuiltInRedLED);
  delay(20000);

} // loop()
MQTT
Arduino with ESP8266 board sends data as client to broker via MQTT. Example
In the Arduino IDE:
- Set the board to "Generic ESP8266 Module" or "Adafruit Feather HUZZAH ESP8266"
- Set the board port (look at Windows Devices & Printers to identify the device port).
Write/Read FLASH
The ESP8266 does not have EEPROM, only FLASH. You can use the EEPROM library to read/write to FLASH.
#include <EEPROM.h>
String sSSID = "";
String sPSWD = "";

void setup() {
  Serial.begin(115200);
  while (!Serial) {
    delay(1);
  }
  Serial.println("\nSerial ready");

  EEPROM.begin(512);
  sSSID = ReadFromFLASH(0, 30);
  sPSWD = ReadFromFLASH(50, 30);
  if (sSSID.length() == 0) {
    // FLASH has not been written to previously
    String sSSID = "your-wifi-ssid";
    String sPSWD = "your-wifi-password";
    if (WriteToFLASH(sSSID, sPSWD) == false) {
      Serial.println("FLASH write error!");
    } else {
      Serial.println("SSID & PSWD written to FLASH");
    }
  } else {
    Serial.print("sSSID = '"); Serial.print(sSSID); Serial.println("'");
    Serial.print("sPSWD = '"); Serial.print(sPSWD); Serial.println("'");
  }

} // setup()


void loop() {
}


boolean WriteToFLASH(String sSSID, String sPSWD) {
  // Write sSSID and sPSWD to ESP8266 FLASH memory
  if (sSSID.length() > 49 || sPSWD.length() > 511) {
    return false;
  }
  sSSID += ";";
  byte pos = 0;
  for(int n=pos;n<sSSID.length()+pos;n++){
     EEPROM.write(n,sSSID[n-pos]);
  }
  sPSWD += ";";
  pos = 50;
  for(int n=pos;n<sPSWD.length()+pos;n++){
     EEPROM.write(n,sPSWD[n-pos]);
  }
  EEPROM.commit();
  return true;
} // WriteToFLASH()


String ReadFromFLASH(int iPos, int iLen) {
  // Read the string beginning from FLASH at
  // iPos with length iLen.
  // Returns a zero length string if the FLASH
  // has not been written to previously at the
  // specified address.
  String sTmp;
  int iCountYuml = 0;
  for (int n = iPos; n < iLen+iPos; ++n) {
     if(char(EEPROM.read(n))!=';'){
      if(EEPROM.read(n) == 0xFF) {
        // DEC = 255; HEX = 0xFF when FLASH has not been previously written to.
        iCountYuml++;
      }
      //  space, formfeed ('\f'), newline ('\n'), carriage return ('\r'), horizontal tab ('\t'), and vertical tab ('\v')
      if(isWhitespace(char(EEPROM.read(n)))){
          //do nothing
        } else {
          sTmp += String(char(EEPROM.read(n)));
        }
     } else {
      n=iLen+iPos;
     }
  }
  if (iCountYuml == iLen) {
    // FLASH has not been previously written to.
    sTmp = "";
  }
  return sTmp;
} // ReadFromFLASH()
Get wifi ssid & pswd via form and store in FLASH - part 1
Direct Communication Between Two ESP8266 Devices
Configure one device as an Access Point (AP), and the other device as a client in Station Mode (STA), and then communicate directly between them without the use of a router or bridge. Next you choose a transport protocol for the communication between the two devices. User Datagram Protocol (UDP) and Transmission Control Protocol (TCP) are the standard transport protocols. Espressif has created the ESP-Now transport protocol specifically for the the ESP32 and ESP8266 devices.
If your application requires speed (low latency), encrypted communication, and the number of devices involved in the communication is six or less, then ESP-Now is the protocol to choose (although I could not get the encryption to work). If you don't need to send encrypted packets securely, and you need high speed (low latency), and you can afford dropping packets, then UDP is the choice. If you must be sure every packet is received, and in the correct order, and they must be sent securely, then choose TCP.
UDP is a simple protocol that doesn't have error checking and correction, and it is often chosen for time sensitive applications when dropping packets is preferred over delays due to re-transmission of the data. UDP is not as reliable as TCP, but it is faster, and it has much lower latency. UDP has not secure because it has no method to verify that the source of the sending packet actually came from the intended source. TCP and SCTP have error correction capabilities. TCP makes sure all packets are received, they are in order, and that any corruped packets are re-sent. TCP is slower than UDP, but data integrity is high. The default packet length for TCP is 1460 bytes, and for UDP it is 1472 bytes.
At the appliation layer, you have HyperText Transfer Protocol (HTTP), WebSocket, and Open Sound Control (OSC). HTTP involves GET, PUT, and POST requests. And you can use a secure version HTTPS for encryption of the packets. WebSocket is faster than HTTP because it keeps the connection between the client and the server open at all times. OSC uses UDP to send small packages of data fast (low latency).
ESP-Now is a protocol developed by Espressif that enables multiple devices (ESP32 and ESP8266) to communicate directly to each other. Once two devices are paired, the connection can be established without a handshake. The maximum payload is 250 bytes. The messages may be encrypted or unencrypted. Limited to 10 encrypted devices (peers), 6 if SoftAP or SoftAP + Station mode. Communications between devices can be one-to-one, one-to-many, and many-to-one. A callback function informs the application layer of a transmission success or failure. I waa able to send a 52 byte packet as quickly as every 100 ms (10 Hz) with no loss in packets. The same 52 byte packet loss rate was 48% when sent every 10 ms (100 Hz), and 90% at 1 ms (1 kHz). I struggled to get the encrypted options to work because of installation and library function referrence issues. The best library installation source I found was; ESP8266 Arduino Core - Installing
Another approach to using encrypted ESP-Now is the ESP8266 WiFi Mesh Library. It is claimed that small data payloads such as 234 bytes can be transmitted in 2-4 ms.
Security on EPS32 with ESP-NOW
Getting Started with ESP-NOW (ESP8266 NodeMCU with Arduino IDE)
ESP-NOW Two-Way Communication Between ESP8266 NodeMCU Boards
ESP8266 Direct TCP & UDP Communication
UDP Between Two Adafruit Feather HUZZAH ESP8266
My test results between two devices in close proximity were 0% packet loss at a send rate of 100 ms (10 Hz), and 96% UDP packet loss at a send rate of 10 ms (100 Hz).
Access Point (AP)
/*
  Adafruit Feather HUZZA ESP8266
  https://www.adafruit.com/product/2821

  Configure device as an Access Point (AP) to receive
  simulated date/time stamped sensor data from another
  device via User Datagram Protocol (UDP).
  Sends back the packet sent in order to confirm
  receiption (better if hash was sent back).

   0% UDP packet loss at 50 ms  (20 Hz) send rate in close proximity.
  96% UDP packet loss at 10 ms (100 Hz) send rate in close proximity.

  Portions of this example derived from: https://siytek.com/communication-between-two-esp8266/

*/


/////////////////////////////////////////////////////////////////////////
const byte pinBuiltInRedLED = 0;  // reverse wired, LOW turns LED on
const byte pinBuiltInBlueLED = 2; // reverse wired, LOW turns LED on

void blinkLED(byte ledPIN){
  //  consumes 300 ms.
  for(int i = 5; i>0; i--){
    digitalWrite(ledPIN, LOW);
    delay(30);
    digitalWrite(ledPIN, HIGH);
    delay(30);
  }
} //blinkLED()

/////////////////////////////////////////////////////////////////////////
// UDP

#include <ESP8266WiFi.h>
#include <WiFiUdp.h>

// Set AP credentials
#define AP_SSID "ESP8266_AP"
#define AP_PASS "SavvyMicrocontrollerSolutions.info"

// UDP
WiFiUDP UDP;
IPAddress local_IP(192,168,4,1);
IPAddress gateway(192,168,4,1);
IPAddress subnet(255,255,255,0);
#define UDP_PORT 4210

// UDP Buffer
char packetBuffer[31];  // UDP_TX_PACKET_MAX_SIZE = 8192

#include <Hash.h>
uint8_t hashBuffer[20];


void setup() {
  Serial.begin(115200);
  while (!Serial) {
    delay(1);
  }
  Serial.println("\nSerial ready");

  pinMode(pinBuiltInRedLED, OUTPUT);
  digitalWrite(pinBuiltInRedLED, HIGH);

  pinMode(pinBuiltInBlueLED, OUTPUT);
  digitalWrite(pinBuiltInBlueLED, HIGH);

  // Begin Access Point
  Serial.println("Starting access point...");
  WiFi.softAPConfig(local_IP, gateway, subnet);
  WiFi.softAP(AP_SSID, AP_PASS);
  Serial.println(WiFi.localIP());

  // Begin listening to UDP port
  UDP.begin(UDP_PORT);
  Serial.print("Listening on UDP port ");
  Serial.println(UDP_PORT);

} // setup()


void loop() {

  int packetSize = UDP.parsePacket();
  // NOTE:  packetSize doesn't include the null character at the end. 0x00
  if (packetSize > 0) {
    digitalWrite(pinBuiltInBlueLED, LOW);
    Serial.printf("Received %d bytes from %s, port %d\n", packetSize, UDP.remoteIP().toString().c_str(), UDP.remotePort());
    int packetLength = UDP.read(packetBuffer, packetSize);

    if (packetBuffer[packetLength] == 0x00) {
      //Serial.println("packetBuffer is null terminated (0x00)");
    } else {
      //Serial.println("packetBuffer is NOT null terminated (0x00)");
      // terminate packetBuffer with ASCII zero character to make it a proper string for printing to the serial port.
      packetBuffer[packetLength] = '\0';
    }

    /*
    char * ptr;
    unsigned int HiLo = atol(ptr);
    Serial.print("HiLo = '"); Serial.print(HiLo); Serial.println("'");
    ptr = strtok(NULL, "");
    unsigned int packetCount = atol(ptr);
    Serial.print("packetCount = '"); Serial.print(packetCount); Serial.println("'");
    */

    /*
    Serial.print("UDP packet contents: '");
    for (unsigned int i=0; i<packetSize; i++) {
      //Serial.print(i); Serial.print(" ");
      Serial.print((int)packetBuffer[i]);
      Serial.print(" ");
    }
    Serial.println("'");
    */

    Serial.print("UDP packet received '"); Serial.print(packetBuffer); Serial.println("'");
    //Serial.printf("UDP packet contents: '%s\n'", packetBuffer);
    Serial.println("");


    // Send a return packet to acknowledge it was received
    UDP.beginPacket(UDP.remoteIP(), UDP.remotePort());
    // Send back exactly what was sent..
    UDP.write(packetBuffer);
    UDP.endPacket();

    digitalWrite(pinBuiltInBlueLED, HIGH);
  } // packet received

} // loop()
Station Mode (STA)
/*
  Adafruit Feather HUZZA ESP8266
  https://www.adafruit.com/product/2821

  Configure device for Station Mode (STA) and send
  simulated date/time stamped sensor data
  ("20200216T150644Z;+6.534755E+06") to another ESP8266
  configured as an Access Point (AP) via User Datagram
  Protocol (UDP).  Tracks UDP packet confirmation receipts
  and reports packet error loss.
  Turns on built-in red LED if any packet is lost.

   0% UDP packet loss at 50 ms  (20 Hz) send rate in close proximity.
  96% UDP packet loss at 10 ms (100 Hz) send rate in close proximity.

  Portions of this example derived from: https://siytek.com/communication-between-two-esp8266/
*/


/////////////////////////////////////////////////////////////////////////
const byte pinBuiltInRedLED = 0;  // reverse wired, LOW turns LED on
const byte pinBuiltInBlueLED = 2; // reverse wired, LOW turns LED on

void blinkLED(byte ledPIN){
  //  consumes 300 ms.
  for(int i = 5; i>0; i--){
    digitalWrite(ledPIN, LOW);
    delay(30);
    digitalWrite(ledPIN, HIGH);
    delay(30);
  }
} //blinkLED()

/////////////////////////////////////////////////////////////////////////


void BuildSimulatedSerialSensorData(byte *arr, int len) {
  //  Populates arr with a simulated serial data string with
  //  a ISO 8601 date time stamp and a sensor value (float).
  //  "20200216T150644Z;+6.534755E+06"

  for (int i=0; i<len; i++) {
    arr[i] = 0x20;  // space character
    //arr[i] = 0x00;  // null character
  }

  /*
  char cTemp[] = "20200216T150644Z;+6.534755E+06";
  for (int i=0; i<sizeof(cTemp); i++) {
    arr[i] = cTemp[i];
  }
  */

  // Get a random ISO8601 date time string
  byte dateTimeIso8601[16];
  BuildIso8601DateTimeRandom(dateTimeIso8601, sizeof(dateTimeIso8601));
  int iLastPos = 0;
  for (int i=0; i<sizeof(dateTimeIso8601); i++) {
    arr[i] = char(dateTimeIso8601[i]);
    iLastPos++;
  }
  iLastPos--;
  //Serial.print("iLastPos = "); Serial.println(iLastPos);

  // Add the ";"
  arr[iLastPos+1] = ';';
  iLastPos++;
  //Serial.print("iLastPos = "); Serial.println(iLastPos);

  // Get a random floating point value as a formatted string
  // to scientific notation.
  byte cDouble[14];
  BuildDoubleValRandom(cDouble, sizeof(cDouble));
  int f = iLastPos + 1;
  for (int i=0; i<sizeof(cDouble); i++) {
    arr[f] = char(cDouble[i]);
    f++;
    iLastPos++;
  }
  iLastPos--;
  // NOTE:  BuildDoubleValRandom terminates with 0x00 null character
} // BuildSimulatedSerialSensorData()


void BuildDoubleValRandom(byte *arr, int len) {
  // Populates arr with a string representation of a
  // random floating point number formatted in scientific
  // notation with at least 7 significant digits.
  // +6.534755E+06"
  //
  for (int i=0; i<len; i++) {
    //arr[i] = 0x20;  // space character
    arr[i] = 0x00;  // null character
  }
  long myLong = random(100000000, 999999999);
  long divisor;
  int expnt = random(2,6);
  switch (expnt) {
    case 2:
      divisor = 100;
      break;
    case 3:
      divisor = 1000;
      break;
    case 4:
      divisor = 10000;
      break;
    case 5:
      divisor = 100000;
    default:
      divisor = 10;
  }
  float f = (float)myLong / divisor;
  int sign = random(10);
  if (sign <= 5) {
    f = f * (-1.0);
  }
  //Serial.print("f = "); Serial.println(f, 6);
  char cDbl[len];
  sprintf(cDbl, "%+E", f);
  //Serial.print("cDbl = '"); Serial.print(cDbl); Serial.println("'");
  //char cDbl[sigFig+8];
  //dtostre(f, cDbl, sigFig, 2);   // 2 = show + sign
  // cDbl = '-1.0002e+05'
  //Serial.print("cDbl = '"); Serial.print(cDbl); Serial.println("'");
  for (int i=0; i<strlen(cDbl); i++) {
    arr[i] = cDbl[i];
  }
  arr[len-1] = 0x00;  // null character
} // BuildDoubleValRandom()


void BuildIso8601DateTimeRandom(byte *arr, int len) {
  // Updates arr with characters representing a random
  // ISO8601 date time formatted as: 20200216T150644Z
  for (int i=0; i<len; i++) {
    //arr[i] = 0x20;  // space character
    arr[i] = 0x00;  // null character
  }
  int iLastPos = 0;
  unsigned long iYearMonthDay = 20200000;
  byte iMonth = random(1, 13);
  iYearMonthDay += iMonth * 100;
  byte iDay = random(1, 29);
  iYearMonthDay += iDay;
  char cYearMonthDay[9];
  sprintf(cYearMonthDay, "%lu", iYearMonthDay);
  //Serial.print("\ncYearMonthDay = '"); Serial.print(cYearMonthDay); Serial.println("'");
  for (int i=0; i<sizeof(cYearMonthDay); i++) {
    arr[i] = cYearMonthDay[i];
  }
  iLastPos = strlen(cYearMonthDay)-1;
  //Serial.print("iLastPos = "); Serial.println(iLastPos);
  // Add the "T"
  arr[iLastPos+1] = 'T';
  iLastPos = iLastPos + 1;
  // hour
  byte iTime = random(1, 24);
  char cTime[3];
  sprintf(cTime, "%02u", iTime);
  //Serial.print("cTime = '"); Serial.print(cTime); Serial.println("'");
  int f = 0;
  for (int i=iLastPos+1; i<iLastPos+sizeof(cTime); i++) {
    //Serial.print(i); Serial.print(", "); Serial.println(cTime[f]);
    arr[i] = cTime[f];
    f++;
  }
  iLastPos = iLastPos + 2;
  //Serial.print("iLastPos = "); Serial.println(iLastPos);
  // minute
  iTime = random(1, 59);
  sprintf(cTime, "%02u", iTime);
  //Serial.print("cTime = '"); Serial.print(cTime); Serial.println("'");
  f = 0;
  for (int i=iLastPos+1; i<iLastPos+sizeof(cTime); i++) {
    //Serial.print(i); Serial.print(", "); Serial.println(cTime[f]);
    arr[i] = cTime[f];
    f++;
  }
  iLastPos = iLastPos + 2;
  //Serial.print("iLastPos = "); Serial.println(iLastPos);
  // second
  iTime = random(1, 59);
  sprintf(cTime, "%02u", iTime);
  //Serial.print("cTime = '"); Serial.print(cTime); Serial.println("'");
  f = 0;
  for (int i=iLastPos+1; i<iLastPos+sizeof(cTime); i++) {
    //Serial.print(i); Serial.print(", "); Serial.println(cTime[f]);
    arr[i] = cTime[f];
    f++;
  }
  iLastPos = iLastPos + 2;
  //Serial.print("iLastPos = "); Serial.println(iLastPos);
  // Add the "Z"
  arr[iLastPos+1] = 'Z';
  iLastPos = iLastPos + 1;
  //Serial.print("iLastPos = "); Serial.println(iLastPos);
} // BuildIso8601DateTimeRandom


/////////////////////////////////////////////////////////////////////////
// UDP

#include <ESP8266WiFi.h>
#include <WiFiUdp.h>

// Set AP credentials
#define WIFI_SSID "ESP8266_AP"
#define WIFI_PASS "SavvyMicrocontrollerSolutions.info"

// UDP
WiFiUDP UDP;
IPAddress remote_IP(192,168,4,1);
#define UDP_PORT 4210

// UDP Buffer
const unsigned int packetSizeTx = 31;  // UDP_TX_PACKET_MAX_SIZE = 8192
char packetBufferTx[packetSizeTx];

char packetBufferRx[31];

unsigned long lastTime = 0;
//  UDP packet loss results for AP & STA in close proximity:
//     0% for 100 ms  (10 Hz)
//     0% for  50 ms  (50 Hz)
//    96% for  10 ms  (100 Hz)
unsigned long timerDelay = 100;  // data send rate in milliseconds

unsigned long packetCount = 0;
unsigned long packetErrCount = 0;

void setup() {
  Serial.begin(115200);
  while (!Serial) {
    delay(1);
  }
  Serial.println("\nSerial ready");

  pinMode(pinBuiltInRedLED, OUTPUT);
  digitalWrite(pinBuiltInRedLED, HIGH);

  pinMode(pinBuiltInBlueLED, OUTPUT);
  digitalWrite(pinBuiltInBlueLED, HIGH);

  // Begin WiFi
  WiFi.begin(WIFI_SSID, WIFI_PASS);
  WiFi.mode(WIFI_STA);

  // Connecting to WiFi...
  Serial.print("Connecting to ");
  Serial.print(WIFI_SSID);
  // Loop continuously while WiFi is not connected
  while (WiFi.status() != WL_CONNECTED)
  {
    delay(100);
    Serial.print(".");
  }

  // Connected to WiFi
  Serial.println();
  Serial.print("Connected! IP address: ");
  Serial.println(WiFi.localIP());

  // Begin UDP port
  UDP.begin(UDP_PORT);
  Serial.print("Opening UDP port ");
  Serial.println(UDP_PORT);
  Serial.println("");

} // setup()


void loop() {

  if ((millis() - lastTime) > timerDelay) {

    digitalWrite(pinBuiltInBlueLED, LOW);
    if (packetCount > 0 ) {
      if (packetErrCount == 0) {
        Serial.print(packetCount); Serial.println(" UDP packets sent, 0% lost");
      } else {
        Serial.print(packetCount); Serial.print(" UDP packets sent, "); Serial.print(((float)packetErrCount/(float)packetCount)*100.0); Serial.println("% lost");
      }
      Serial.println("");
    }

    // Send Packet
    packetCount++;
    UDP.beginPacket(remote_IP, UDP_PORT);

    //packetBufferTx[0] = HiLoRandom();
    //packetBufferTx[1] = random(255);
    //packetBufferTx[2] = 255;
    //UDP.write(packetBufferTx);

    // OR:
    //UDP.write(HiLoRandom());
    //UDP.write(random(255));
    //UDP.write(255);

    // OR:
    // Create simulated date/time data packet with sensor
    // floating point value.  "20200216T150644Z;+-6.534755E+06"
    byte cData[31]; // 30 + CrLf = 31
    BuildSimulatedSerialSensorData(cData, sizeof(cData));
    Serial.print("Sending: '");
    for (int i=0; i<sizeof(cData); i++) {
      Serial.print(char(cData[i]));
      packetBufferTx[i] = char(cData[i]);
    }
    Serial.println("'");
    UDP.write(packetBufferTx);

    UDP.endPacket();

    lastTime = millis();
  } // timer


  // Look for return packet acknowledging receipt of the
  // send UDP packet from the server (AP).
  int packetSizeRx = UDP.parsePacket();
  if (packetSizeRx > 0) {
    //Serial.printf("Received %d bytes from %s, port %d\n", packetSizeRx, UDP.remoteIP().toString().c_str(), UDP.remotePort());
    int packetLenRx = UDP.read(packetBufferRx, packetSizeRx);
    if (packetLenRx > 0) {
      digitalWrite(pinBuiltInBlueLED, HIGH);
      if (packetBufferRx[packetLenRx] == 0x00) {
        //Serial.println("packetBufferRx is null terminated (0x00)");
      } else {
        //Serial.println("packetBufferRx is NOT null terminated (0x00)");
        // terminate packetBufferRx with ASCII zero character to make it a proper string for printing to the serial port.
        packetBufferRx[packetLenRx] = '\0';
      }
      //Serial.print("UDP packet received '"); Serial.print(packetBufferRx); Serial.println("'");
      if (strcmp(packetBufferRx, packetBufferTx) == 0) {
        Serial.printf("UDP packet reception confirmed by AP %s, port %d\n", UDP.remoteIP().toString().c_str(), UDP.remotePort());
      } else {
        packetErrCount++;
        digitalWrite(pinBuiltInRedLED, LOW);
        Serial.println("UDP packet lost!");
      }
    } // packetLenRx > 0
  } // return packet from AP


} // loop()
MQTT
MQTT (Message Queuing Telemetry Transport) is a machine-to-machine connectivity protocol that utilizes a Broker to coordinate communication between a Publisher and a Subscriber.
Links
Arduino ESP8266WiFi library docs
Get wifi ssid & pswd via form and store in FLASH - part 1
Get wifi ssid & pswd via form and store in FLASH - part 2
ESP8266 Webserver: Getting query parameters
ESP8266 Webserver: Accessing the body of a HTTP request
using an http server and an HTML form to control an LED
Sparkfun ESP8266 Thing Hookup Guide
AF ESP8266 webclient example on GitHub
Running MicroPython on Adafruit Feather HUZZAH ESP8266
Arduino core for ESP8266 WiFi chip
Do you need help developing or customizing a IoT product for your needs? Send me an email requesting a free one hour phone / web share consultation.
The information presented on this website is for the author's use only. Use of this information by anyone other than the author is offered as guidelines and non-professional advice only. No liability is assumed by the author or this web site.
.png)




.png)
